I designed and painted these nesting dolls during Summer 2012. The designs are based on the characters from the LucasArts adventure game series Monkey Island - as the games range from point-and-click
pixels in 1990 to 3D in 2009 - there was quite a lot of room for creativity in the design process. For example, below shows the various depictions of the main character Guybrush Threepwood throughout the series.
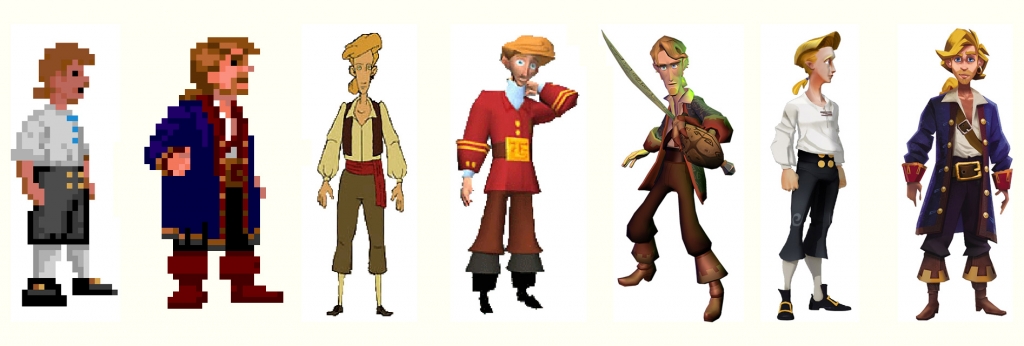 |
| Image source: http://gamewise.co/characters/322/Guybrush-Threepwood/History |
I worked mostly using the pixellated designs from the first two games as this helped narrow the character choice, but I included elements from the other games too. For example, for Guybrush's design I used his coat pattern from the fifth game Tales of Monkey Island.
This was the first time I had painted on a 3D surface, and surprisingly I didn't find it too difficult. The process was slow as I only worked on small bits when I had time but this allowed me to change the designs and to adapt the 2D drawings I did below for the 3D surface. There were some slight issues joining the front and back designs together at the sides. I've actually already bought another set of blank dolls to paint with new designs, however the new set are more squat than these, meaning that I am having to pay more attention to the 'join' between the front and back. So much so, that I currently am planning to do four drawings for each doll - a front, back and two sides.
 |
| LeChuck design |
 |
| Voodoo Lady design |
 |
| Guybrush Threepwood design |
Once I had completed the drawn designs for each doll, I scanned the drawings into my computer. I used Macromedia Fireworks to edit and colour the designs. The whole process was very trial and error, although it seemed to work well and I found that having coloured designs were vital during the painting process. I think this success lay largely in the slow but steady working process which involved lots of planning and designing which ultimately meant I avoided lots of potential problems.
 |
| Colour design - front |
 |
| Colour front - small |
The actual painting process was not too long - I began with the smallest first. I sanded the dolls and sketched a very basic copy of the design onto the doll. For the larger dolls I painted the areas at the 'opening' first, leaving the top and bottom of the dolls separate whilst the area dried just so that they did not get sealed together by the paint. I used acrylic paints and applied a couple of coats of varnish to each doll. The largest doll is 14cm tall and the shortest is 2cm.
 |
| Front view of painted dolls |
 |
| Rear view of painted dolls |


Hi, are you selling these dolls? I am interested, please contact me at alkis21@freemail.gr
ReplyDelete